Saturday, April 5, 2014

T-Shirt Yarn


I love T-shirt yarn. It can be used for so many things and is super easy to make. I've used it to make baskets, rugs and necklaces. I love the stretch it has and how thick it is. Did I mention that I LOVE t-shirt yarn! When I first discovered t-shirt yarn, I found that it was pretty expensive - well for what I'm used to paying for yarn - so I found some awesome tutorials on the internet on how to make my own. I have a ton of old shirts from high school and various events that we have been apart of so I decided to give it a try.(This was all before my blogging days!) I was amazed at how easy it was and allowed me to re-purpose my things, which I'm all about.
 
What you will need:
 
An old t-shirt with no side seams (Jersey cotton)
Fabric scissors


Lay your t-shirt out on a flat surface and smooth our all the wrinkles - better than this!


Cut off the bottom seam.
 
 
Cut from under one arm pit to the other.
 
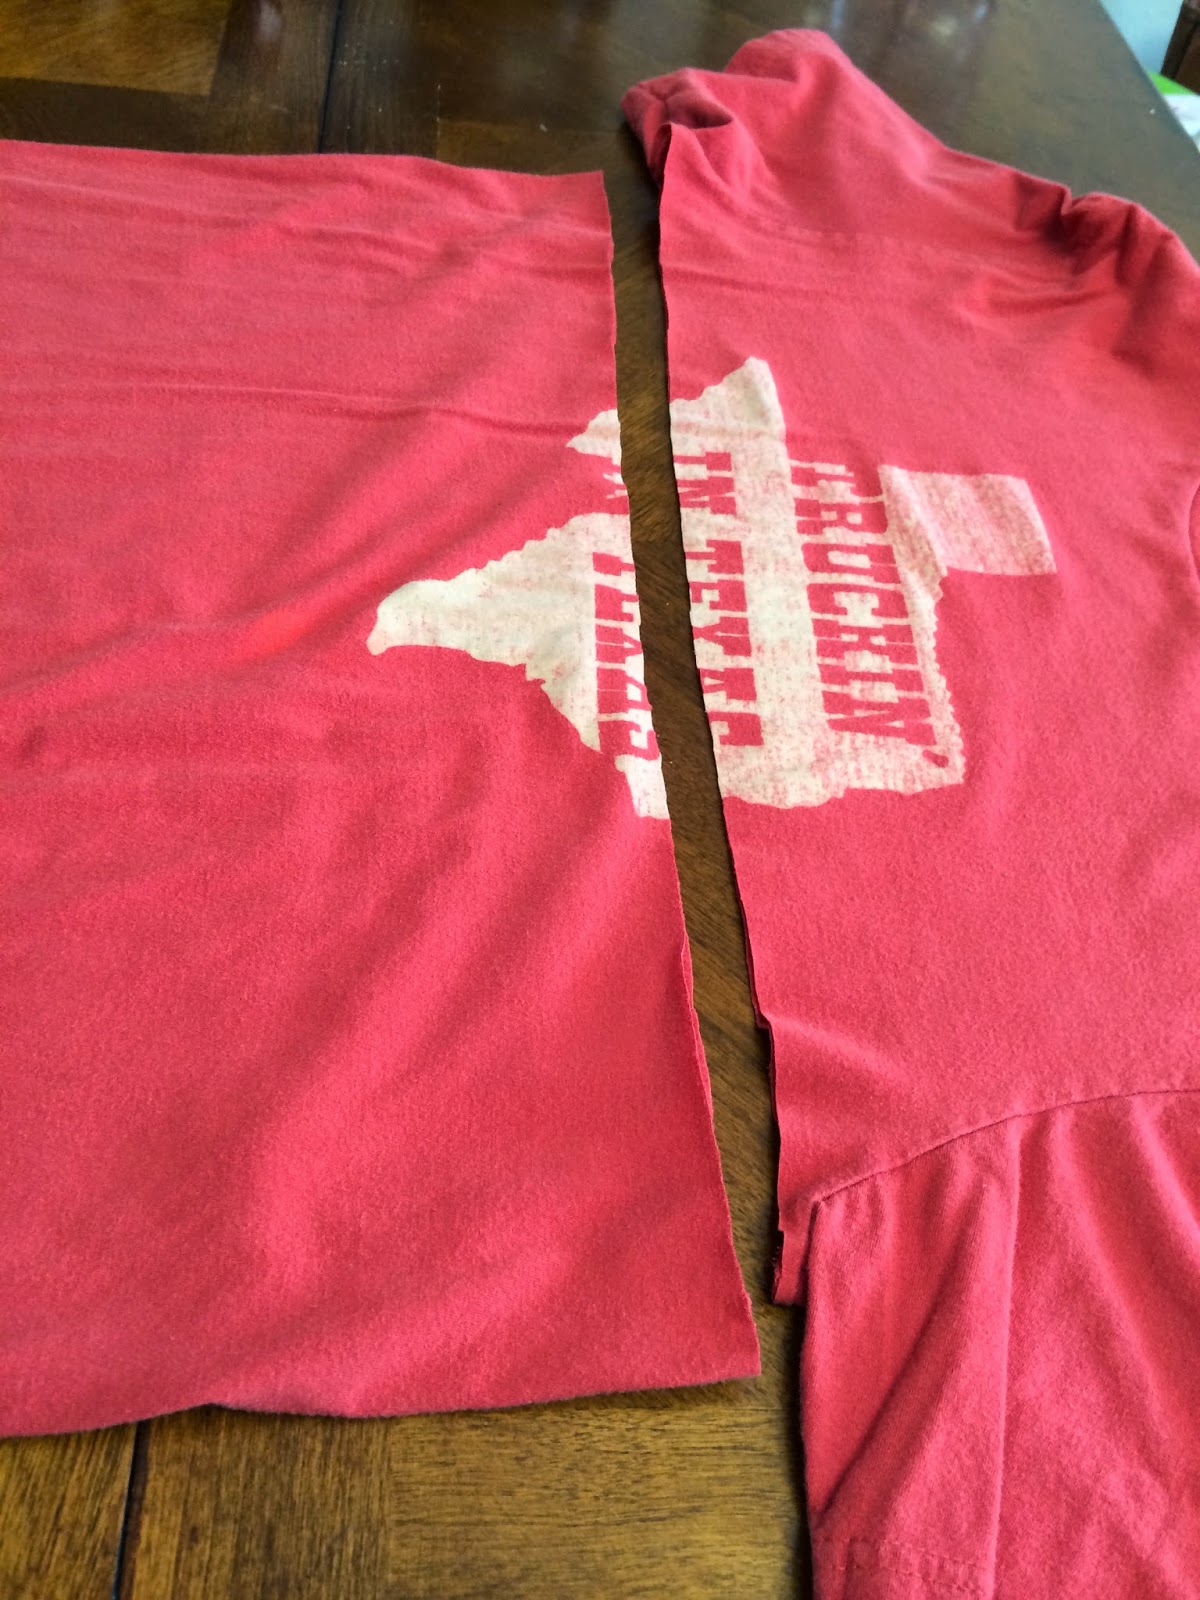
So it should look like the picture below.
 
Next you will fold one side over the other but leave about an inch of the bottom part showing. Smooth out the wrinkles.
 
Start cutting about 1inch sections from the bottom to the top, but don't cut into the one inch that you left showing - that's the important part!

 
This is what you will have when done cutting your strips.
 
 
Now shake out the strips and you will have something that looks like this.
 
Cut diagonally from one side to the other, just as the picture shows below. This is the one inch section that I didn't cut into when cutting the strips.
 
You will end up with one long strip of fabric.
 
Now just pull on the ends all the way through to get the fabric to roll.
 
Then you roll into a ball.
 
 
Easy - right?!


The red ball is about 16 yards. I didn't measure the gray one but I'm guessing it would be about the same thing although the gray t-shirt wasn't as stretchy was the red one.
 

Wednesday, April 2, 2014

Crocheted Flower Headband


I have been wanting to make a crocheted headband for my daughter since she was born and just never got around to it. She turns 5 months on Sunday so I decided I needed to get it done before she turned 6 months so I could make them for her pictures. Well I'm extremely happy with the result. She looks pretty darn cute with it on and I will be making more. Don't you just love the expression on her face - big cheeks!

I made a simple flower from a pattern that I used to follow when I first starting crocheting and then continued with the chain for the desired length until it reached around her head, then did a slip stitch to attach the chain to the back of the flower. Then just weave in your end. Done!

Supplies:
Size H crochet hook
I used Super Saver White yarn

Flower:
Make a magic ring, chain 1
Round 1 - 5 sc inside the ring, join with a sl st
Round 2 - Ch 1, 2 sc in each st around, join with a sl st
Round 3 - *Ch 2, 2 dc in the next st, ch 2, sl st in the next st* - repeat 4 times

~ This will produce a 5 petal flower ~

Once you do your last sl st, do another sl st in the back of your flower. That way your chain will start in the back of the flower. Chain as many as you need for the desired length then sl st to the back of the flower.  I believe I chained 38 to fit around her head comfortably. Be careful not to twist your chain when doing your last sl st. Finish off and then weave in ends.


As you can see, she loves my camera and looking at herself! She is just like her daddy!

Crocheted Baby Beanie


I’m sure we have all found a million crocheted baby hats on the internet and there are many patterns out there as well. I have been searching the internet for one that I just had to make and of course I found many that were super cute, but I had to purchase those patterns (Bummer!) So I came up with one of my own using some very basic crochet skills. If you can double crochet, you can make this cute, simple hat!
I made this hat for my daughter’s baptism. I wanted something to cover her head as it was winter and the bonnet that came with the gown didn’t fit her head. She does have a large head for her age – they tell me she will be very smart, lots of brains!
 
Size: 3-6 Months

Supplies:
Size H (5.00MM) crochet hook
Worsted weight yarn (I used RedHeart White)
Tapestry needle
Yarn/stitch marker (I use a bobby pin)
 
Crocheted Baby Beanie
Start – Chain 4 and join with a sl st to the first chain to make a ring.
Round 1: 8 DC in the ring, sl stitch to the first DC (8 DC)
Round 2: Ch 3, *2 DC in each DC* repeat around, sl st to the first DC (16 DC)
Round 3:  Ch 3, *DC in the next DC, 2 DC in the next DC*, repeat around, sl st to the first DC (24 DC)
Round 4:  Ch 3, *DC in the next 2 DC, 2 DC in the next DC*, repeat around, sl st to the first DC (32 DC)
Round 5: Ch 3, *DC in the next 3 DC, 2 DC in the next DC*, repeat around, sl st to the first DC (40 DC)

Round 6: Ch 3, *DC in the next 4 DC, 2 DC in the next DC* repeat around, sl st to the first DC (48 DC)
~Your flat circle should measure 4.50 inches across, maybe a little more depending on how tight or loose you crochet. (mine was just a tish over)~
Round 7:  Ch 3, *DC in each st*, sl st to first DC

Round 8-12: Repeat round 7
Round 9: Ch 1, SC in each st around, sl st to the first st

Round 10-11: Repeat round 9 - once complete, fasten off and weave in the ends.

I didn't add the flowers until later as I just wanted a white hat, but here is the flower pattern if you want to add those on. I think they add a pop of color!


Flower

Make a magic ring, chain 1

Round 1: 5 sc inside the ring, join with a sl st

Round 2: Ch 1, 2 sc in each st around, join with a sl st

Round 3: *Ch 2, 2 dc in the next st, ch 2, sl st in the next st* - repeat 4 times. Fasten off and weave in ends.


Just leave a long tail and weave through the inside of your hat to attach the flowers.
 
Enjoy!